Home Home Home Home Home Home Home
CakeSpy

Featured: 

My adventure at Ben & Jerry's in Vermont!


Unicorn Love: the Eating Disorder Recovery Blog


 Buy my brilliant books!

Buy my new book!

Buy my first book, too! 

CakeSpy Online Retail!


Archives
Gallery

Fantastic appliance for cake making on DHgate.com

everyrecipe.co.nz

Craftsy Writer
Thursday
Oct232014

Pillsbury Bake-Off Countdown: Chewy Gingersnaps with White Chocolate Drizzle

Who says that ginger cookies have to be snappy? These ones are soft, and in the best way possible. It makes them all the better to cuddle up with on a cold night with a cup of cocoa!

This yummy recipe is courtesy of Michele Kusma of Columbus, Ohio. Good luck at the Bake-Off!

Chewy Gingersnaps with White Chocolate Drizzle 

  • Prep Time: 20 Min
  • Total Time: 1 Hr 45 Min
  • Makes: 30 cookies

Ingredients

  • 1 container Pillsbury Gluten Free refrigerated pie and pastry dough
  • 1 cup sugar
  • 1 tablespoon ground ginger
  • 1 teaspoon ground cinnamon
  • 1 teaspoon baking soda
  • 1/4 cup molasses
  • 1 cup white vanilla baking chips

Procedure

  1. Heat oven to 350°F. Let dough stand at room temperature 10 minutes to soften.
  2. In large bowl, break up dough. Add remaining ingredients except baking chips. Mix with electric mixer on medium-low speed about 2 minutes or until well blended.
  3. Shape dough into 30 (1 1/2-inch) balls. Place 3 inches apart on ungreased cookie sheets (dark cookie sheets not recommended); flatten with fingers into 2-inch rounds.
  4. Bake 10 to 14 minutes or until edges are set. Cool 4 minutes; remove from cookie sheets to cooling racks. Cool completely, about 15 minutes.
  5. Meanwhile, in small microwavable bowl, microwave baking chips uncovered on High 45 to 60 seconds, stirring once, until chips can be stirred smooth.
  6. Place in small resealable food-storage plastic bag. Cut off tiny corner of bag; squeeze bag to drizzle melted baking chips over cooled cookies. Store covered.

About this post: the Pillsbury Bake-Off is coming in November! Check out my coverage of the 45th and 46th Bake-Off events, and follow the recipes posted so far by clicking the bakeoff tag below.

Wednesday
Oct222014

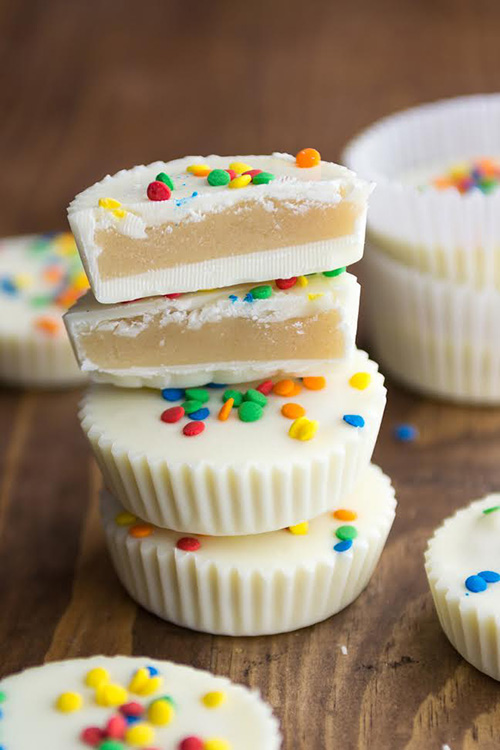
Sugar Cookie Dough Cups from Dessert Mash-Ups

I felt a shiver of excitement upon receiving a review copy of the new book Dessert Mashups by Dorothy Kern of Crazy For Crust (a site well worth checking out if you ask me). Before I even opened the book, I already loved the concept. Upon opening it, I just got more excited: s'mores cakes, cheesecake cookie dough truffles, carrot cake-coffee cake...the tasty mashups prove that if some is good, more is amazing (something I have long suspected).

Basically, I'm going to tell you that if you liked my first book, CakeSpy Presents Sweet Treats for a Sugar-Filled Life, then you absolutely need to buy Dessert Mashups

In case I haven't made myself clear enough, I'll bring the point home with an excerpt from the book, for sugar cookie dough cups. This excerpt, including headnote and photo, is reprinted with permission from Ulysses Press. Thanks dudes!

Sugar Cookie Dough Cups

My father-in-law was a sugar-cookie fanatic. Every Christmas I’d make our family sugar cookies and I’d have to make him his own extra batch so he wouldn’t eat all of ours (and he would have!). Over the years I started making lots of other sugar-cookie treats, from bars to candy, to give him for every holiday and birthday. I made these in his memory, and I know that he would have loved them (and eaten them all without gaining an ounce).

  • Yield 12
  • Prep Time 45 minutes
  • Chill Time 1 hour 15 minutes

Ingredients

  • 1⁄4 cup (1⁄2 stick) unsalted butter, softened
  • 1⁄2 cup granulated sugar
  • 1⁄2 teaspoon vanilla extract
  • 2 teaspoons whole milk
  • 1⁄2 cup all-purpose flour
  • 12 to 16 ounces vanilla-flavored melting chocolate
  • Sprinkles (optional)

Procedure

  1. In the bowl of a stand mixer fitted with the paddle attachment or with a hand mixer in a large bowl, cream together the butter and sugar. Beat in the vanilla, milk, and flour.
  2. Form the dough into a disk. Place between two sheets of waxed paper on a cutting board. Roll out to 1⁄4 inch thick. I like to peel the waxed paper off the top, then flip the dough over and peel it off the bottom after every few rolls so that it doesn’t stick. Refrigerate for at least 15 minutes.
  3. Using a 2-inch round cookie cutter, cut 24 circles of dough, rerolling as necessary. Place half the dough rounds on top of the other half, for a total of 12. Refrigerate until ready to assemble cups.
  4. Melt the melting chocolate according to the package directions. (See Candy Dipping Tips.)
  5. Line a standard 12-cup muffin pan with paper liners. Spoon about 1 tablespoon of melting chocolate into the bottom of each liner, enough to coat the bottom. Tap the pan to settle the candy and release any air bubbles.
  6. Place one cookie dough round in each muffin liner. Top with
1 to 2 tablespoons more melting chocolate, spreading as necessary to make sure that the two edges of chocolate meet. Tap the pan again to release air bubbles. Top with sprinkles. Refrigerate until set, about 1 hour. Store in an airtight container in the refrigerator for up to one week. These can also be frozen.
  7. Tip: These are a big dose of sweet! To make them more bite-size, use a mini muffin pan, with mini muffin liners and a 1-inch round cookie cutter. You can also make these with your favorite flavor of cookie dough. Just substitute 1 tablespoon of milk for each egg called for in the recipe to make an eggless cookie dough, and you can omit any leavening that is called for. Use vanilla or chocolate candy melts, depending on your cookie dough flavor.

Someone come over my house, because I feel like I could eat the whole batch!

Wednesday
Oct222014

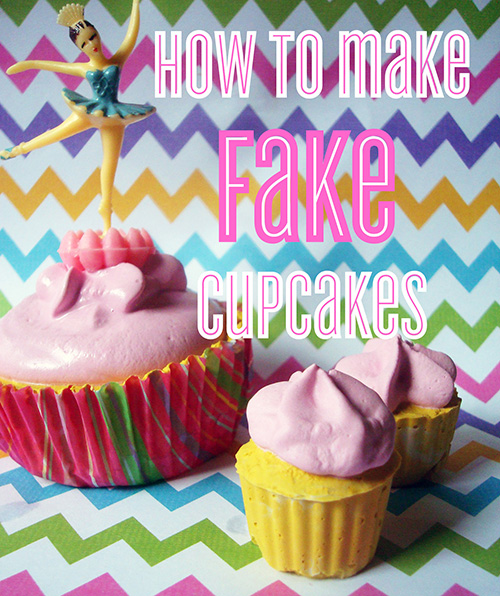
Making Fake Cupcakes: A Tutorial

Making fake cupcakes: you might be surprised at how useful these sweet (but not to eat) treats can be. Should you need to invest your time in this valuable life skill, this helpful tutorial is waiting for you.

Sunday
Oct192014

Better than Canadian Bacon: Breakfast Nanaimo Bars Recipe

Let's play a game. I'm going to list a few ingredients, and you guess what meal I'm making.

Here goes: 

  • Oatmeal
  • Granola
  • Maple syrup
  • Butter
  • Coconut

Do you think I'm talking about breakfast? Good, because that means I have sufficiently breakfast-ified these Nanaimo bars, and therefore, they are officially OK for A.M. eating. Why would I want to do such a thing? 
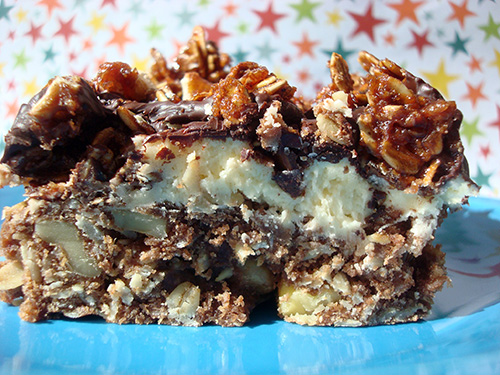
I have a lot of trouble understanding why doughnuts, scones, and danish are OK for breakfast, yet cookies and cake are not.
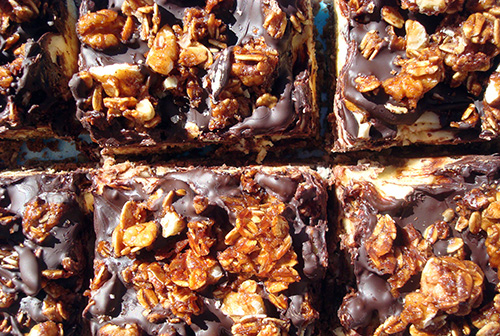
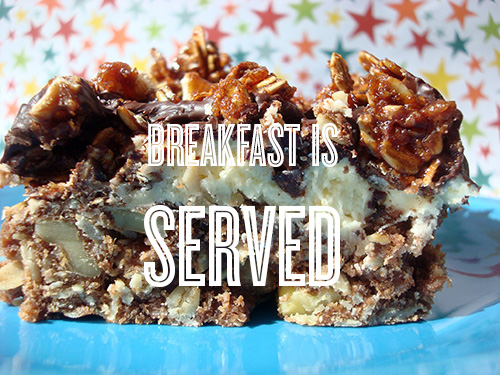
My logic is this: if you are what you eat, why not start out the day by eating (and being) amazing? These breakfast-friendly Nanaimo bars are the perfect way to start your day right, and an ideal indulgent holiday breakfast treat. They've got enough of the classic makings to be recognizable as the famed Canadian treat, but enough breakfast stylings, such as oats in the crust (which is baked, not simply mixed and no-baked; it is loosely based on the crust used in King Arthur Flour's "President's Day Cherry Squares" recipe) and a tasty crunchy granola on top, that they become an exciting and new thing.

Nanaimo bars for breakfast? Believe it.
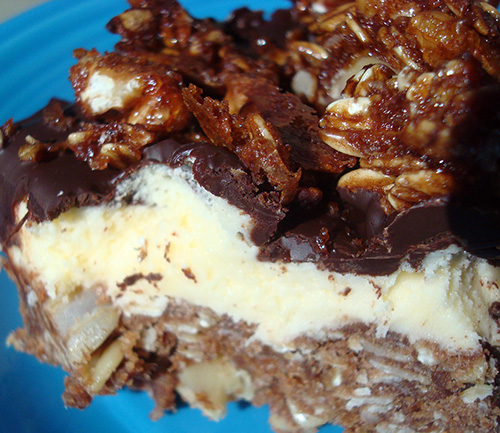
I'm especially excited to share these as a recipe featuring King Arthur Flour (whole wheat no less--another point for these being health food!). Ever since my awesome Bake For Good experience with the esteemed flour-maker, I've maintained a good relationship with them, and when they recently asked if I'd come up with a breakfast recipe using their flour, I was more than happy to do so!

Oh, and I should tell you, these bars freeze beautifully. You can freeze up to 2 months; let them come to room temperature before serving. 

Breakfast Nanaimo bars

Makes up to 36 tiny bars, or 9 massive breakfast bars
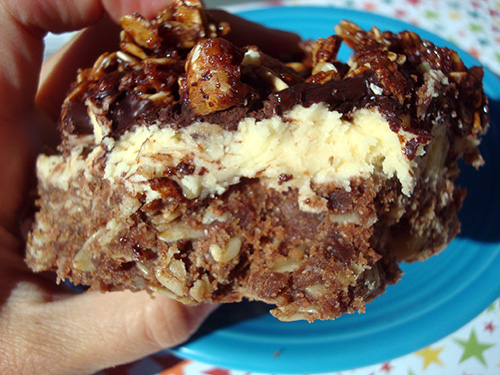
For the crust

  • 1 1/4 cup rolled oats
  • 1 cup King Arthur Whole Wheat Flour
  • 1 cup coconut
  • 1/2 cup coarsely chopped nuts
  • 1 teaspoon salt
  • 1 1/2 sticks butter
  • 2 tablespoons unsweetened cocoa
  • 1 cup packed dark brown sugar

For the middle layer

  • 1 stick unsalted butter
  • 1 teaspoon vanilla extract
  • 2 tablespoons Bird's Custard powder
  • 2 cups confectioners' sugar, sifted

For the top layer

  • 4 ounces chocolate, coarsely chopped 
  • 2 tablespoons unsalted butter

For the granola garnish

  • 1 cup rolled oats
  • 1/2 cup nuts
  • 1/2 cup brown sugar, packed
  • 1 tablespoon unsweetened cocoa
  • 1/2 teaspoon salt
  • 1/2 teaspoon vanilla
  • 1/4 cup maple syrup

Procedure

  1. Start by making the crust. Grease a 9x9-inch square baking pan; add a strip of parchment with the ends poking up two sides of the pan so you have "handles" to make removal easy later. Preheat the oven to 350 degrees F. In a large bowl, mix together the oats, flour, coconut, nuts, and salt. 
  2. In a saucepan, melt the butter with the cocoa and brown sugar. Once melted, stir into the dry mixture. Mix everything until combined, and press into your prepared pan.
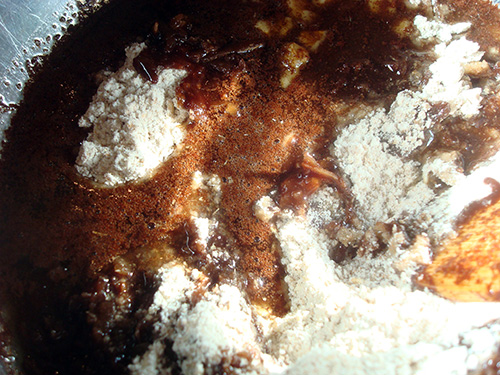
  3. Bake in the preheated oven for 13-15 minutes, or until it has a dull finish on top. Remove from oven and let cool completely. You can hasten the process by putting the slightly cooled pan in the refrigerator for 30 minutes.
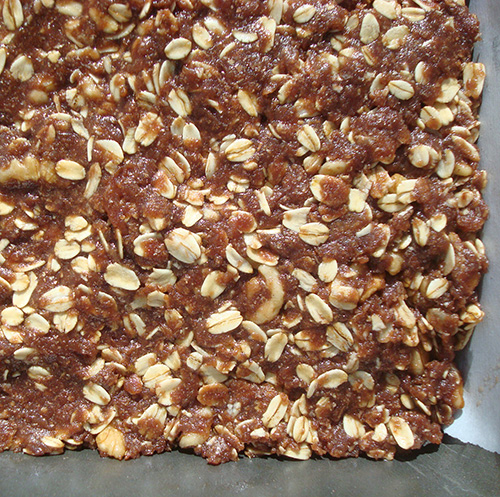
  4. Make the filling. In the bowl of a stand mixer fitted with the paddle attachment, mix all of the filling ingredients on low speed until fluffy--3 to 5 minutes. While not in the ingredient list for this recipe, if you are having trouble incorporating the sugar and butter, add a small amount of milk or cream until it reaches your desired spreading consistency. Gently spread on top of the bottom layer. Take pains to smooth this layer as much as possible (I like to use the end of a metal spatula to smooth it) as the topping will only lay as smooth as this layer. 
  5. Place the pan in the refrigerator and let cool for 30 minutes or up to 2 hours. This will make the filling firm enough for the next layer to be put on top without ripping or damaging it in any way.
  6. Meantime, make the granola garnish. Preheat the oven to 325 degrees F. Mix all of the ingredients together in a bowl, and scatter on a parchment-lined baking sheet. Bake for 15 minutes; remove from the oven and stir right on the sheet. Return to the oven and bake for 15 more minutes, or until toasty and firm. Let cool completely, and break up by hand into small pieces.
  7. Ready to put it all together? OK. Now, we'll make the topping. In a double boiler, melt the chocolate and butter until, well, melted. Spread on top of the middle layer, working quickly because it will set rapidly as it is applied to the cool surface, and too much working of the hot mixture can tear up the delicate middle layer. 
  8. Scatter the broken-up granola on top while the chocolate layer is still slightly wet on top to ensure it adheres. Score the bars (this is imporant!) before the chocolate has fully set as it will make life so much easier when you want to serve these sweet treats. Place in the fridge and let them set for 20 minutes.
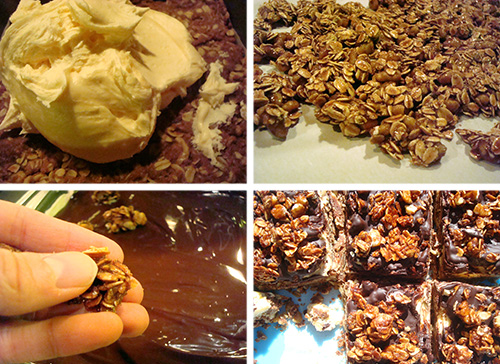
  9. Although typically I would suggest continued storage of these in the fridge, I find that they're actually quite nicer when left at room temperature. It's up to you, but I found that the topping got kind of hard when left in the fridge. If you do prefer to store in the fridge, let them come to room temperature before serving. Likewise, these bars can be made ahead and frozen for up to 2 months. Once again, let 'em come to room temp before serving.
What's your favorite sweet to eat in the morning?

Sunday
Oct192014

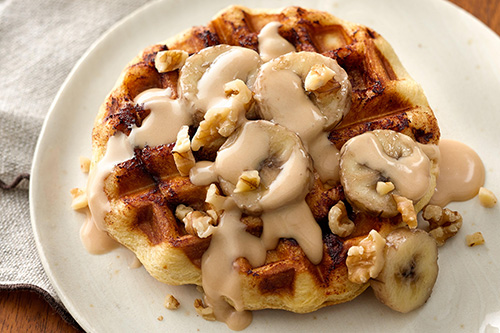
Pillsbury Bake-Off Countdown: Chai-Glazed Cinnamon Waffles

Note: the Pillsbury Bake-Off is coming in November! Check out my coverage of the 45th and 46th Bake-Off, and follow the recipes posted so far by clicking the bakeoff tag below.
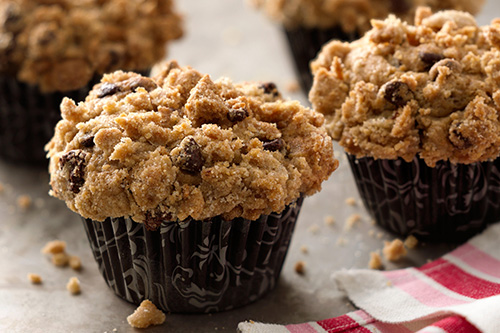
I'm super excited about this entry from Mimi Chang from Middletown, New Jersey. First and foremost, because who doesn't like waffles? I even have a waffle wallet--not kidding.

Second, Mimi is from my neck of the woods in New Jersey! Good luck at the Bake-Off!

Chai-Glazed Cinnamon Waffles

  • Prep Time: 30 Min
  • Total Time: 30 Min
  • Makes: 5 waffles

Ingredients

  • 1/3 cup finely chopped walnuts
  • 1/2 teaspoon butter extract
  • 2 bananas, sliced
  • 1/3 cup heavy whipping cream
  • 2 tea bags chai tea
  • 1 can Pillsbury Grands! refrigerated cinnamon rolls with icing (5 rolls)
  • 1 cup powdered sugar

Procedure

  1. Heat oven to 350°F. Line cookie sheet with parchment paper. In small bowl; mix walnuts, 1/4 teaspoon of the butter extract and 1/4 teaspoon sea salt. Spread in ungreased 15x10x1-inch pan. Bake 6 to 10 minutes, stirring occasionally, until light brown. Set aside.
  2. Meanwhile, in medium bowl, toss banana slices and remaining 1/4 teaspoon butter extract. Place in single layer on cookie sheet. Bake about 20 minutes or until softened.
  3. Meanwhile, in small microwavable bowl, microwave whipping cream uncovered on High 40 to 50 seconds or until steaming. Add tea bags to whipping cream. Let steep 5 minutes. Squeeze tea bags into cream; discard tea bags.
  4. Meanwhile, heat waffle maker. (Waffle makers without a nonstick coating may need to be sprayed with nonstick spray before cinnamon roll is added.)
  5. Separate dough into 5 rolls; reserve icing. Place 1 roll in center of each waffle section. Close lid of waffle maker. Bake 2 to 3 minutes or until golden brown. Repeat with remaining rolls.
  6. Meanwhile, in medium bowl, mix chai whipping cream, powdered sugar, reserved icing and 2 tablespoons water until smooth. To serve, top waffles with bananas and walnut mixture. Drizzle with chai icing.
Saturday
Oct182014

Pillsbury Bake-Off Countdown: Chocolate-in-the-Middle Biscotti

Note: the Pillsbury Bake-Off is coming in November! Check out my coverage of the 45th and 46th Bake-Off, and follow the recipes posted so far by clicking the bakeoff tag below.

Marcia Jacobovitz of Cedar Grove, New Jersey knows what most biscotti is missing: chocolate filling! I think this is a perfect way to keep naturally dry biscotti interesting and a little moist, don't you?

Good luck at the Bake-Off!

Chocolate-in-the-middle Biscotti

  • Prep Time: 25 Min
  • Total Time: 1 Hr 25 Min
  • Makes: 15 biscotti

Ingredients

  • 1 container Pillsbury Gluten Free refrigerated chocolate chip cookie dough
  • 1/4 cup semisweet chocolate chips
  • 1/4 cup Jif Creamy Peanut Butter
  • 1/4 teaspoon ground cinnamon
  • 1/2 cup powdered sugar

Procedure

  1. Heat oven to 350°F (325°F for dark or nonstick cookie sheet). Line large cookie sheet with parchment paper. Measure 1/3 cup cookie dough; set aside.
  2. In small microwavable bowl, microwave chocolate chips uncovered on High 40 to 50 seconds, stirring once, until chips can be stirred smooth; set aside.
  3. In large bowl, break up remaining cookie dough. Add peanut butter. Beat with electric mixer on medium speed 30 to 60 seconds or until well blended. On cookie sheet, shape dough into 14x2-inch rectangle. Make a 1 inch wide by 1/2 inch deep indentation lengthwise down center of rectangle.
  4. In same large bowl, beat reserved 1/3 cup cookie dough, the cinnamon and melted chocolate chips on medium speed 30 to 60 seconds or until well blended, adding water 1/4 teaspoon at a time, if necessary, to create a dough. Roll dough into 14-inch long rope. Place rope in indentation down center of cookie dough rectangle. Bring sides of dough up around chocolate rope; pinch edges to seal. Place diagonally, seam side down, on cookie sheet. Flatten to 3 inches wide.
  5. Bake 20 to 24 minutes or until golden brown and center is firm to the touch. Slide parchment and biscotti rectangle from cookie sheet to cooling rack. Cool 15 minutes; remove from parchment, and place on cutting board. Line cookie sheet with parchment paper. Using sharp knife, cut rectangle into 1-inch diagonal slices. Place on cookie sheet 1 inch apart.
  6. Bake 10 to 13 minutes or until deep golden brown. Remove from cookie sheet to cooling rack. Cool completely, about 15 minutes.
  7. Meanwhile, in small bowl, mix powdered sugar and 2 to 3 teaspoons water until thin enough to drizzle. Place in resealable food-storage plastic bag. Cut off tiny corner of bag; squeeze bag to drizzle icing over cooled biscotti. Store covered.
Saturday
Oct182014

How to Draw Characters in Conversation

More sweet art tips for you, my dears! I wrote a great (if you ask me) article about how to add conversation to your illustrations. Read the full article here!

Saturday
Oct182014

Pillsbury Bake-Off Countdown: Banana-Chocolate Chip Streusel Muffins

Note: the Pillsbury Bake-Off is coming in November! Check out my coverage of the 45th and 46th Bake-Off, and follow the recipes posted so far by clicking the bakeoff tag below.

These are the type of muffins that make me happy: the kind that include chocolate chip cookie dough. You heard me. This recipe by Kim Van Dunk of Caldwell, New Jersey is a Bake-Off finalist I can really appreciate!

Click to read more ...

Saturday
Oct182014

Pillsbury Bake-Off Countdown: Ginger-Macadamia Breakfast Rolls


 You know what's great? Biting into a morning breakfast roll and finding a sweet, creamy filling. Yes, yes, yes!

This sweet treat is courtesy of Linda Sellner of Hooksett, New Hampshire. Good luck at the Bake-Off!

Ginger-Macadamia Breakfast Rolls

  • Prep Time: 15 Min
  • Total Time: 45 Min
  • Makes: 8 rolls

Ingredients

  • 1/2 cup chopped macadamia nuts
  • 1/4 cup packed brown sugar
  • 1 tablespoon plus 1 1/2 teaspoons grated gingerroot
  • 1/2 teaspoon vanilla extract
  • 3 oz cream cheese, softened (from 8-oz package)
  • 1 can Pillsbury refrigerated reduced fat crescent dinner rolls or crescent dinner rolls (8 rolls)

Procedure

  1. Heat oven to 350°F. In medium bowl, mix macadamia nuts, brown sugar, gingerroot and vanilla until blended.
  2. In small bowl, place 4 teaspoons of the macadamia nut mixture; set aside. Add cream cheese to remaining macadamia nut mixture; mix until well blended.
  3. Separate dough into 8 triangles. Spoon about 1 heaping tablespoon cream cheese mixture onto shortest side of each triangle. Roll up, starting at shortest side and rolling to opposite point. Place point side down, about 2 inches apart, on ungreased cookie sheet; tuck ends under. Sprinkle 1/2 teaspoon reserved macadamia nut mixture evenly over top of each crescent.
  4. Bake 14 to 17 minutes or until golden brown. Remove to cooling rack. Cool 10 minutes. Serve warm.

CakeSpy Note: The Pillsbury Bake-Off is coming in November! Since I so deeply loved attending the 45th Bake-Off as well as the 46th Bake-Off, I thought I would get you excited the 47th one early by sharing all of the sweet recipes in the running. Follow them by clicking the bakeoff tag below to see the recipes posted so far.

Saturday
Oct182014

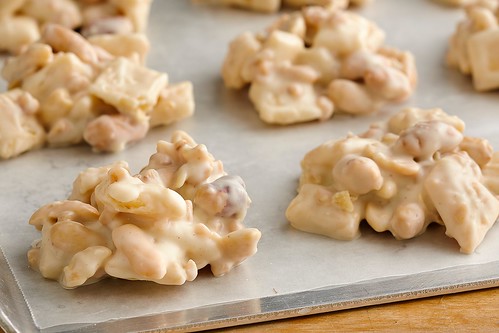
Pillsbury Bake-Off Countdown: Peanutty Pie Crust Clusters

Peanutty pie crust clusters

Peanutty Pie Crust Clusters.Try saying that five times fast. Better yet, bake up a batch and enjoy the delicious benefits of having your mouth too full to say the name! This tasty recipe comes from Beth Royals of Richmond, Virginia. Good luck at the Bake-Off!

Peanutty Pie Crust Clusters

  • Prep Time: 30 Min
  • Total Time: 45 Min
  • Makes: 30 clusters

Ingredients

  • 1 Pillsbury refrigerated pie crust, softened as directed on box
  • 1 bag (12 oz) white vanilla baking chips (2 cups)
  • 1 tablespoon baking Sticks Butter Flavor All-Vegetable Shortening
  • 1 tablespoon creamy peanut butter
  • 1 cup salted cocktail peanuts
  • 2/3 cup toffee bits

Procedure

  1. Heat oven to 450°F. Line 2 cookie sheets with Reynolds® Cut-Rite® Wax Paper.
  2. Unroll pie crust on work surface. With pizza cutter or knife, cut into 16 rows by 16 rows to make small squares. Arrange squares in single layer on large ungreased cookie sheet. Bake 6 to 8 minutes or until light golden brown. Remove squares from pan to cooling rack. Cool completely, about 5 minutes.
  3. In large microwavable bowl, microwave baking chips, shortening and peanut butter uncovered on High 1 minute to 1 minute 30 seconds, stirring once, until chips can be stirred smooth. Add pie crust squares, peanuts and toffee bits; stir gently until evenly coated. Immediately drop by heaping tablespoonfuls onto lined cookie sheets. (If mixture gets too thick, microwave on High 15 seconds; stir.) Refrigerate about 15 minutes or until set. Store covered.

Note: the Pillsbury Bake-Off is coming in November! Check out my coverage of the 45th and 46th Bake-Off, and follow the recipes posted so far by clicking the bakeoff tag below.

© Cakespy, all rights reserved. Powered by Squarespace.