Home Home Home Home Home Home Home
CakeSpy

Featured: 

My adventure at Ben & Jerry's in Vermont!


Unicorn Love: the Eating Disorder Recovery Blog


 Buy my brilliant books!

Buy my new book!

Buy my first book, too! 

CakeSpy Online Retail!


Archives
Gallery

Fantastic appliance for cake making on DHgate.com

everyrecipe.co.nz

Craftsy Writer

Entries from December 1, 2014 - December 31, 2014

Wednesday
Dec032014

Red Velvet Cake with Chocolate Ganache Filling

Have you ever found yourself eating red velvet cake and thinking "hmm, isn't this cake supposed to have some chocolate in it?". I certainly have. While the cake does in fact contain cocoa, it's delicate, and can easily be overshadowed by the rich cream cheese frosting which typically covers the cake.

This red velvet cake brings chocolate back with a sweet surprise: in addition to the rich cream cheese frosting used to cover it on the top and sides, it has a deliciously decadent chocolate ganache filling, too. The ganache brings out the cocoa-scented flavor of the cake, and it works in sweet harmony with the cream cheese. It's a beautiful way to unify the flavors of red velvet. 

No, it's not traditional; no, I'm not sorry. Because this cake tastes great. 

Red Velvet Cake with Ganache Filling


Makes 1 9-inch cake

For the cake

  • 2 heaping tablespoons unsweetened cocoa (not dutch-process), sifted
  • 1 teaspoon concentrated gel food coloring
  • 1 1/2 tablespoons water
  • 2 ¼ cups cake flour, sifted
  • 1 teaspoon salt
  • 1 stick unsalted butter, softened
  • 1 ¼ cups sugar
  • 2 large eggs
  • 1 teaspoon vanilla extract
  • 1 cup plus 2 tablespoons buttermilk
  • 1 teaspoon baking soda
  • 1 teaspoon white vinegar

Note: this recipe has been adjusted for high altitude by reducing the sugar by ¼ cup and by increasing the buttermilk by 2 tablespoons. 

Ganache filling 

  • 1/2 pound good quality bittersweet chocolate, finely chopped
  • 1/2 cup heavy whipping cream
  • pinch salt 

Cream cheese frosting 

  • 1/2 cup unsalted butter, softened
  • 8 ounces (1 cup) cream cheese, softened (do not use low-fat)
  • 1 teaspoon vanilla extract
  • 4 cups confectioners' sugar

 Procedure

  1. Preheat the oven to 350 degrees F. Grease, flour, and line with parchment 2 8-inch round cake pans.
  2. In a small bowl, combine the sifted cocoa, food coloring, and water. Mix together until it forms a thick but lump-free paste. Set to the side.
  3. In a medium bowl, combine the cake flour and salt. Give them a stir to combine; set to the side.
  4. In the bowl of a stand mixer fitted with the paddle attachment, combine the butter and sugar. Mix on medium-high speed for 3 minutes; the mixture should be fluffy.
  5. Add the eggs, one at a time, pausing to scrape down the sides of the bowl with each addition. Stir in the vanilla. Stir in the coloring mix.
  6. Add the flour alternately with the buttermilk, mixing on low speed and scraping the bowl after each addition.
  7. Now, gear yourself up to move quickly for a few minutes. Don’t be tempted to pick up the phone or take a bathroom break.
  8. In a ½ cup size bowl or larger, combine the baking soda and vinegar (it will bubble up--don’t panic, that’s why you used the size cup you did to mix) and add it immediately to the batter. Mix until combined.
  9. Divide the batter evenly between the two cake pans, and put in the oven.
  10. Bake for 25 minutes or until a cake tester or toothpick inserted in the center comes out clean.
  11. Let the cakes cool in the pans for about 10 minutes. Run a sharp knife along the edges of the pan to loosen the edges, and turn the cakes out on a wire rack to cool completely before frosting. If the cakes have formed domes, level using a serrated knife.
  12. Make the ganache. In a saucepan, heat the cream on medium-low heat, stirring occasionally to discourage scorching on the bottom of the pan. Bring it just barely to a boil. Once it comes to a boil, remove from heat immediately. Pour on top of the chocolate. Using a wire whisk, mix the chocolate and cream together until they have become smooth, and the chocolate has melted into the cream. It will be the consistency of a thick hot fudge sauce. Stir in the salt, mixing until smooth. Wait until it has come to room temperature (it will solidify more) before using to fill the cake. 
  13. Make the frosting. In the bowl of a stand mixer fitted with the paddle attachment, cream the cream cheese and butter until very smooth. Stir in the vanilla. Add the confectioners' sugar one cup at a time, mixing well after each addition and pausing to scrape the sides of the bowl with a rubber spatula as needed, until the frosting is smooth and spreadable. You may not add all of the confectioners' sugar.
  14. Assemble the cake. Place one of the layers with the flattest side up on a serving platter. Coat it generously with a thick layer of ganache. You might not use all of the ganache, but if you have extra I don't think this is a bad thing for your life and snacking for the next day or two. Place the second layer on top, flattest side up again. Now, cover all over with that tasty cream cheese frosting. You might want to apply a crumb coat, but it is not necessary. Do, however, cover the cake very generously.
  15. Store in the refrigerator, but serve at room temperature. 

 Do you like Red Velvet cake?

Tuesday
Dec022014

Chocolate Cherry Cookies

Are you ever haunted by the memory of Christmas cookies past? 

I am. Let me tell you about it.

When I was young, there were two cookies in particular which I treasured above the others. They were chocolate chip pistachio cookies (recipe here) and chocolate cherry cookies.

While my mom was happy to hand over the pistachio recipe, she claims a cloudy memory about the chocolate cherry variety. What? They were the best!

I'll tell you about them, and maybe you know of something similar: a chewy yet slightly crumbly chocolate cookie with a cherry pressed inside, and a chocolate ganache type topping, baked right into the top of the cookie. 

I loved those cookies so hard.

This recipe, while not the same as those cookies in my memory, came out awfully good. They have the same flavor combination, and I made them with some Montmorency cherries from Stoneridge Orchards which were recently sent to me in the mail. They have a perfect, shortbread-meets sugar cookie texture base, and the cherry inside works very nicely with the chocolate, giving it an almost almond-y flavor. The chocolate topping bakes up fudge-like, and is extremely pleasant and if not gooey, then it adds a moist element to the cookie.

The candies are mainly for show, but I learned pretty quickly to not display two of them side by side, because, well, boobs. Well, OK, do it--it might make you laugh.

Chocolate cherry cookies

Makes 24

Very loosely based on this recipe 

  • 1/4 cup light brown sugar, packed
  • 1/4 cup granulated sugar
  • 1 cup butter or margarine, softened
  • 1 teaspoon vanilla
  • 1 egg yolk
  • 1-1/2cups all purpose flour
  • pinch salt
  • 1/4cup unsweetened baking cocoa
  • 24 dried cherries

For the topping

  • 1/4 cup butter
  • 1/4 cup chocoalte morsels
  • 1 cup confectioners' sugar
  • 24 cinnamon candies, for garnish

Procedure

  1. Heat oven to 350 degrees F.
  2. In large bowl, beat the sugars, 1 cup butter and the vanilla with electric mixer on medium speed until fluffy. Beat in egg yolk until smooth. Beat in flour, salt, and cocoa.
  3. Shape dough by rounded teaspoonfuls into 1-inch balls. Press a cherry on top of each cookie, and ease the dough around to cover it.
  4. On ungreased cookie sheet, place balls 1 inch apart. With index finger or thumb, make indentation in center of each ball. It might feel a little awkward because of the cherry inside, but I promise, you'll be OK.
  5. Make the topping. Combine the chocolate chips and butter in a microwave-safe bowl and heat in 20-second increments until melty. It will look ugly. Stir in the confectioners' sugar; as it mixes it will become less ugly.
  6. Top each cookie with a dollop of the chocolate mixture, and place a cinnamon candy on top of each.
  7. Bake 7 to 10 minutes or until set. Immediately remove from cookie sheet to wire rack. Cool completely, about 30 minutes.

What's your favorite holiday cookie?

Monday
Dec012014

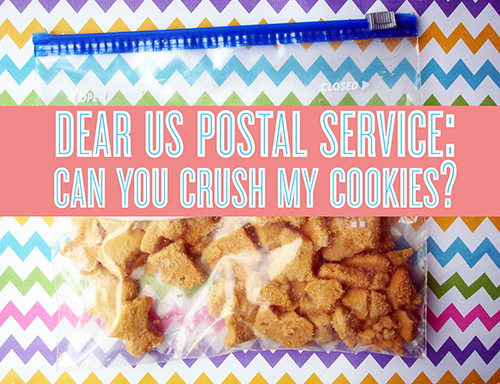
Dear Postal Service: Will You Crush My Cookies for Me? 

With the holidays hurtling toward us at an alarming rate, I'm all about any kitchen shortcut which will streamline my baking. 

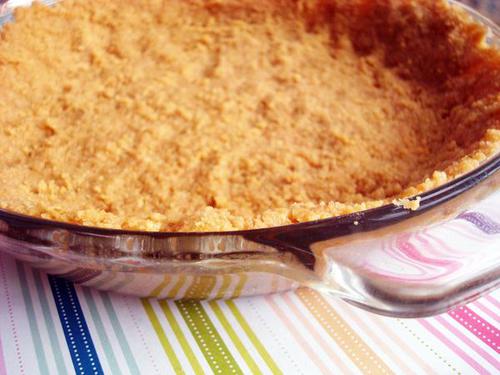
And I have come to the conclusion that crushing cookies for a pie crust takes up way too much time and energy. 

But following my ice cream cone shipping experiment, I began to wonder: could I ship cookies to myself in the mail, and rely on the postal service to crush them for me? I mean, let's be honest: they're not necessarily known for their gentle handling of packages. 

I'm aware that this might sound ridiculous to you.

I realize that you might be tempted to point out a fatal flaw in my thinking here: doesn't packing and sending cookies to yourself take just as long as crushing the darned things? And yes, you are correct. But my thought process was this: if this experiment worked, I could move into shipping large amounts of cookies through the USPS. If I were shipping five cookie crusts' worth at a time, paying a nominal fee for the USPS to crush them just by doing what they do...it seems like a small price to pay. 

I realize too that you might be tempted to say something like "dudette, just get a food processor." Well, I will have you know that I own a food processor. It's just that this way seemed so much more like an adventure. You're not going to deny me a life filled with adventure and joy, are you? 

So, moving past any nay-saying, let me tell you exactly how I went about my experiment.

Here's what I did.

  1. I grabbed a bag of Walkers mini scottie shortbread cookies. Walkers shortbread is one of my favorite cookies to use for a cookie crust. (Note: while I have been paid to do recipes for Walkers in the past, they didn't pay me to say that. It's the truth!).
  2. I poured the entire bag, which is usually a good amount for a pie crust, into a plastic freezer bag and forced out any extra air.
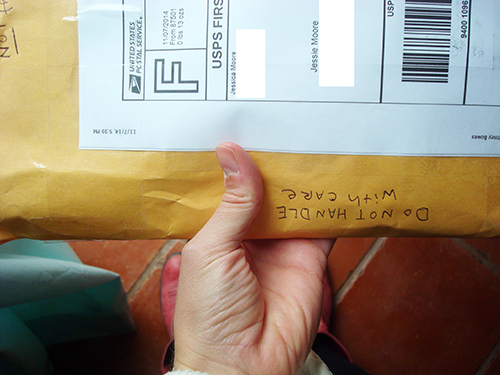
  3. Then I packed it in an envelope WITHOUT padding, so it could be pummeled and crushed by any and every element that came its way.
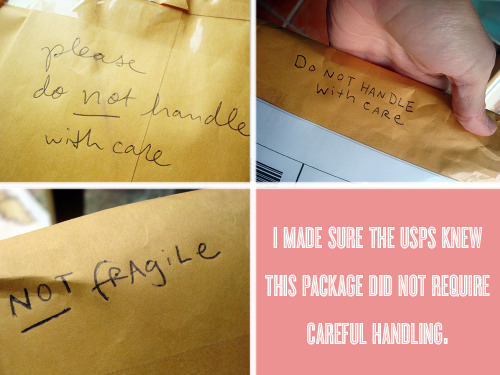
  4. To bring home the point that this was not a parcel to be handled gently, I helpfully labeled it (pictured below) and then popped it in the mailbox. 

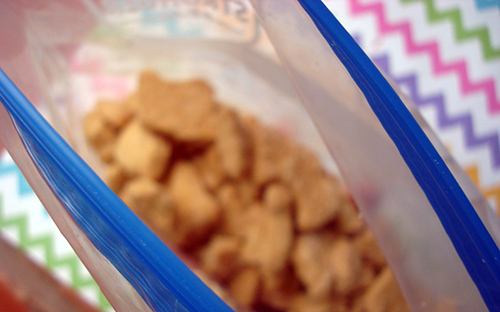
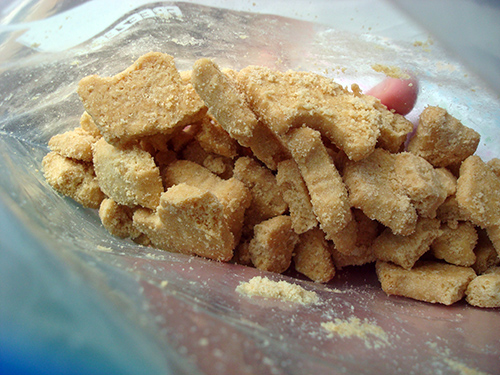
It arrived back to me two days later, and I was disheartened to see that the envelope still held a somewhat lumpy, dimensional shape.

When I opened the parcel, I saw that the cookies were slightly crumbly around the edges, but really not all that different from how I mailed them.

I was tempted to curse the post office for its ginger handling of the parcel. But I held myself back. RESTRAINT.

Oh well, I thought. That answers that: having the USPS crush my cookies for me is not going to be a viable option for streamlining my holiday baking.

But, I do feel like I got some important takeaways from the experiment:

  • It made me laugh while I did it, and that's not for nothing.
  • It did give me a head start with my cookie crushing, though it didn't finish the deed as I'd hoped.
  • It made me realize that perhaps there is an aspect of reverse psychology at hand here. By labeling the parcel in such a way that implied I wanted it to be pummeled, injured, and generally not handled with care, I seem to have ensured that they did just the opposite: I imagine the postal employees cradling the parcel like a delicate flower.

So maybe, when you're shipping something fragile in the future, you should just label it "NOT FRAGILE IN THE LEAST" and it will arrive totally fine.

Hey, I can't say that for certain. But it's definitely food for thought.

What's your favored method of crushing cookies for a cookie crumb pie crust?  

Page 1 ... 1 2 3 4
© Cakespy, all rights reserved. Powered by Squarespace.