Home Home Home Home Home Home Home
CakeSpy

Featured: 

My adventure at Ben & Jerry's in Vermont!


Unicorn Love: the Eating Disorder Recovery Blog


 Buy my brilliant books!

Buy my new book!

Buy my first book, too! 

CakeSpy Online Retail!


Archives
Gallery

Fantastic appliance for cake making on DHgate.com

everyrecipe.co.nz

Craftsy Writer

Entries from April 1, 2014 - April 30, 2014

Sunday
Apr062014

Bali Diary: Love Letter to Magnum Gold

Uluwatu and Padang Padang

I realize that it may sound funny that I had to travel so far to find something which has apparently been under my nose for some time in the United States.

But sometimes fact is stranger than fiction, and it took me going all the way to Bali to discover the Magnum Gold.

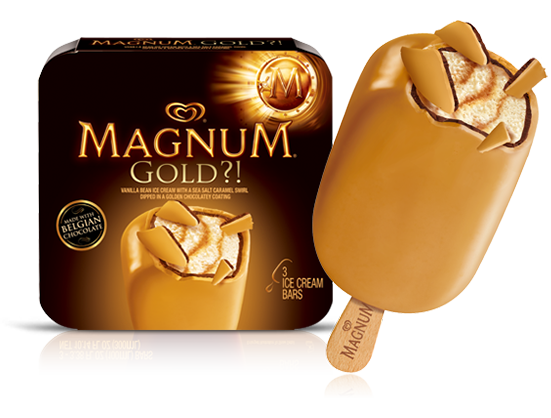
Actually, technically, it's the "GOLD?! Magnum Ice Cream Bar". GOLD?! might, upon first thought, seem like a deeply stupid name. Truthfully, it did to me. But my tune has changed.

Because as it turns out, it's quite accurate to the experience of eating a bar. Because here's what happens, in simplified terms:

Step 1: You wonder "Gold? What's so gold about it?". Shake your head. It's just an ice cream bar, man.

Step 2: Open the bar and take a bite. Exalt as you take the initial bite and discover that the yellow chocolate covers dark chocolate, which gives way to ice cream with delicate swirls of salty caramel. Think, "holy sundae, is this good." Exclaim "GOLD!".

Uluwatu and Padang Padang

So really, the name does make a lot of sense after you try the bar.

The weird thing is that while they exist in the US, I had never heard of them. But apparently Bali has caught the news that something good is happening with this bar, because they are EVERYWHERE there. There are signs in the supermarkets for them, and they are a prominent offering at mini-marts, ice cream vendors, and food markets.

At the Padang Padang beach, there was even an ice cream vendor toting them in a cooler full of dry ice. My friend and teaching BFF in Bali, Jan, flagged him down and bought one. She offered to get me one, too, but I felt that the name was kind of stupid and declined, instead electing to pose for a photo in front of a particularly large rock.

Uluwatu and Padang Padang

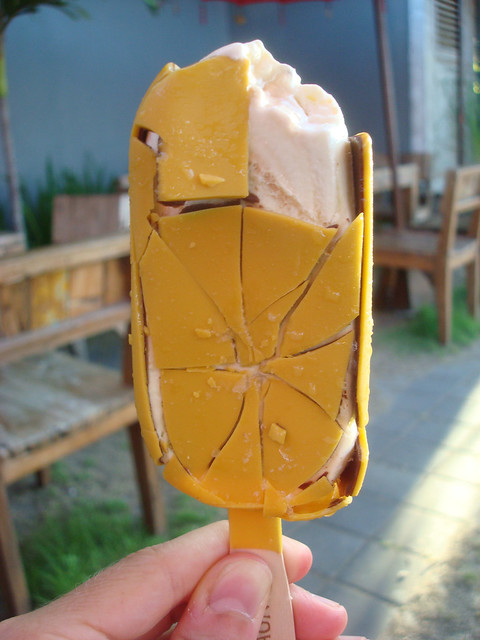
But the moment I saw her dig into the treat, I knew I must have my very own. So later that day, at a pit stop on the way to Uluwatu, I grabbed my own Magnum Gold.

Uluwatu and Padang Padang

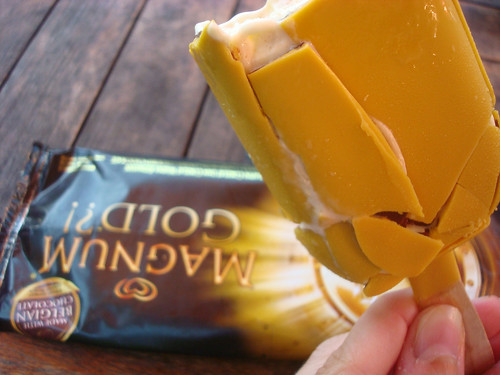
Upon first bite, I was hooked. Rich chocolate that melted in your mouth, with a satisfying white and dark chocolate flavor. The chocolate flavor subsiding into and melding with the creaminess of the inside. No mere vanilla bean ice cream in here--it was swirled with salted caramel. They were delicate swirls, but certainly they were the certain something that took the bar from "good ice cream truck offering" to "I want to eat my weight in this thing".

After I got a Magnum, many of my other Bali BFFs followed in kind. You see, it's the type of thing that you want once you see someone else eating it. 

Uluwatu and Padang Padang

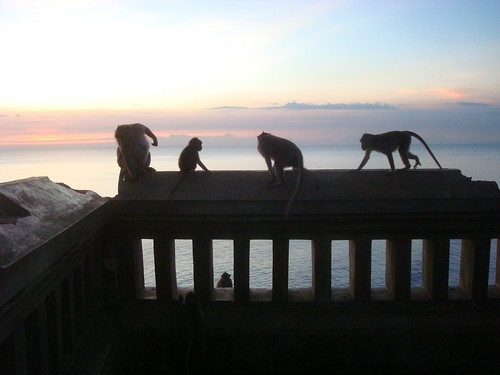
The experience made watching a beautiful sunset with monkeys all around even sweeter.

Thank you, Bali, for so much. But at this moment, thank you most for introducing me to my newest love. Because you know what they say: "Make new desserts, but savor store-bought, one is silver but the other's Gold."

Actually, nobody's ever said that until now, but the main point here is that you have to try this ice cream bar.

Love from Bali,

CakeSpy

Friday
Apr042014

Baker's Dozen: A Batch of Sweet Links!

Remember these? Hoppy easter, indeed.

High calorie treats: consider it a to-do list.

Helpful: a guide to different types of sugar.

Interesting facts about the invention of Jell-O.

Tutorial for children: how to steal Easter candy.

Tips for making Peeps at home.

How to make perfect flan

Ice cream mashups are all the rage. I like this trend.

Sweet and saltines. Maybe don't make them. They're addictive.

How to make isomalt jewels.

Chocolate peanut butter eggs. Happy, happiest Easter.

Hazelnut dessert noodles: I am intrigued.

How to make waffles without a waffle iron. Srsly.

Wednesday
Apr022014

Magic in the Airheads: Magical Rainbow Candy Bowls

Rainbow candy baskets

April showers bring May flowers. But let's not get all doom and gloom and April-is-the-cruelest month, OK? Because where there are rain showers, there is bound to be a rainbow or two. Or ten!

To celebrate this magical rainbow-filled month, I would like to present a project sponsored by Airheads candy which has attained this site's highest status as unicorn-approved: rainbow candy dessert bowls. 

Rainbow candy baskets

These confections are woven from candy, and are a perfectly magical setting for all of your favorite desserts. You could fill them with whipped cream or marshmallow fluff for a light and sweet cloud-like treat, or you could place an entire cupcake inside. They could even be used as decorative candy bowls at parties for a sweet table setting. 

Rainbow candy baskets

I should tell you too that this project was inspired by my time in Bali. Perhaps not for the reason you think, though! 

You see, I had agreed to come up with a project for Airheads before I left, and I figured "meh, I'll find someone's oven to bake in.". Well, as it turns out, they don't have ovens in Bali! So I had to revise my plans and figure out a no-bake treat. I thought back to my friend Not Martha's bacon bowls and an idea was born--a sweet idea, indeed.

Rainbow candy baskets

I have to say, I was rather pleased with my experimentation. It took a little figuring out, because once I wove the rainbows I had trouble getting them to stay together while I shaped the baskets. By employing regular Airheads candy, I melted them down and then used them as a sort of sealant for the inside of the baskets. It helped keep the candy together, and as an added bonus, sealed the inside so that if eating ice cream or something of the like, it would stay contained in the basket. 

You could go for a plain, cloud-like look with the finished baskets, or include additional rainbows. Definitely not excessive.

Rainbow candy baskets

Anyhow, I know that you're probably keen to make this magic happen in the comfort of your own home, so here's how I did it. I realize it seems like a long process based on my writing, but it's really not; I just wanted to be thorough in my explanations. You're welcome!

Rainbow candy baskets

You'll need:

  • 1 cupcake tin
  • double boiler
  • a spatula for stirring, a spoon, and a knife

Rainbow candy baskets

Ingredients

(Per basket)

  • 10 strips Airheads XTremes Sweetly sour candy, in berry rainbow
  • 3 small Airheads candies, unwrapped (choose similar colors for best results)
  • 1 teaspoon water
  • 3 2 tablespoons confectioners' sugar

Procedure

Grab a work surface and let's get weaving. First, grab yourself 10 strips of the rainbow colored Airheads Extreme candy. Line five strips side by side, so that the ends are facing you. 

Leaving an inch of space on the top, begin to weave one of the remaining strips of candy horizontally, over and under the vertical rows.

Grab your next piece, and weave it directly below the previous one, weaving under-and-over so that it forms a basketweave pattern.

Continue alternating with the remaining strips. 

Here's a photo-collage of the process if that all seems confusing:

Weaving a rainbow

OK, set this woven piece of rainbow art to the side for the moment. 

Now, set up your double boiler. Place three Airheads candies (the regular kind) in the top, along with the water and confectioners' sugar. 

Heat on medium, stirring every few minutes. While at first the sugar, water, and candy will remain quite separate, as it melts, the mixture will become thick. You'll see now why it was a good idea to use candy in the same color scheme--the color melts together. It might be ugly if you use different colored candies (like I did the first time) but it will taste fine. Promise. But even so, this won't be the prettiest part of the process.

Rainbow candy baskets

Once the mixture is lightly bubbly, remove from heat. You'll want to work without hesitating at this point as the candy is easier to use while still quite liquid. Gently spoon the candy in the center of your basketweave square. Use a spoon or knife to spread it to cover the woven portion as thoroughly as possible. 

At this point, I decided that rather than slice off the extra bits, I would fold over the non-woven portions. This is easier to do if you start with the pieces which are "under". They will adhere easily to the still sticky candy.

The four corners, I sliced off.

Give it about five minutes for the candy to set slightly, and transfer the candy bundle to your cupcake tin. Gently place it, centered, on top of one of the cups. Using your fingers, gently finesse it into a bowl shape.

Once again, here it all is in pictures. My apologies again for the weird melted candy color. Folding basket

Rainbow candy baskets

Repeat, making as many bowls as you'd like.

To help the bowls "set", I put them in the freezer (right in the cupcake pan) for about 5 to 10 minutes. They easily popped out of the cupcake tin at this point.

Rainbow candy baskets

Fill the bowls with whatever toppings you'd like. If you're not using them immediately, keep them in the cupcake tin so that they will retain their shape.

What would you put in a rainbow bowl?

Tuesday
Apr012014

How to Make Perfect Flan

I don't even like flan, and I like this flan. Here's how to make it.

Page 1 2 3
© Cakespy, all rights reserved. Powered by Squarespace.