Home Home Home Home Home Home Home
CakeSpy

Featured: 

My adventure at Ben & Jerry's in Vermont!


Unicorn Love: the Eating Disorder Recovery Blog


 Buy my brilliant books!

Buy my new book!

Buy my first book, too! 

CakeSpy Online Retail!


Archives
Gallery

Fantastic appliance for cake making on DHgate.com

everyrecipe.co.nz

Craftsy Writer
Monday
Aug172009

Sweet Art: Just Baked in Michigan

Custom Piece for Just Baked Bakery
I have fallen in love, from afar, with Just Baked, a Detroit-area bakery. I discovered them recently when I was hired by a friend of the owner to do a custom painting depicting cupcakes from their menu hanging out in front of the shop.

But business mixed with pleasure the moment I took a look at their menu, which has a gorgeous array of cupcakes:


as well as other baked goods:


If you're in the Detroit area, well then, lucky you--because you can taste the magic for yourself! A second location is set to open very soon.

Just Baked is located at 33309 7 Mile Road, Livonia, MI, (248) 255-1441; online at justbakedshop.com‎.

Sunday
Aug162009

Taste the Rainbow: A Homemade Funfetti Recipe from iheartcuppycakes

Sprinkles have been spilled.
Continuing our monthlong celebration of birthdays and all things sweet, CB from the inimitable iheartcuppycakes.com has kindly donated not only some sweet birthday memories, but also her super sweet recipe for homemade Funfetti Cupcakes. All the fun of a classic childhood treat--but grown up for more adult palates. Here goes:

My birthday is in July. I'm an Independence baby. Tom Cruise eat your heart out! When I was very little my mom would make me a Funfetti birthday cake from cake mix while I "helped" by licking the beaters. It was my favorite part! Even to this day. Don't judge me! It's Funfetti. HA! I think that's why I am not as anti-cake mix like some other bakers because of those great birthday memories with my mom.
Guest post from iheartcuppycakes

Here is my recipe for homemade Funfetti Cupcakes:

Funfetti Cupcakes


Recipe adapted from Cupcakes by Shelly Kaldunski

Makes about 12 cupcakes

For the cupcakes
  • 1-1/4 cups AP flour
  • 1-1/2 tsp baking powder
  • 1/4 tsp salt
  • 3/4 cup sugar
  • 6 tbsp butter, room temperature
  • 1 large egg + 1 egg white, room temperature
  • 1 tsp vanilla extract
  • 1/2 cup milk (I used half-and-half instead)
  • 2 tbsp rainbow sprinkles

For vanilla buttercream
  • 2 sticks butter
  • 7 cups powdered sugar, sifted
  • 1/4 cup milk
  • 1 teaspoon vanilla

Guest post from iheartcuppycakes
Instructions

To make cupcakes—
  1. Preheat oven to 350F.
  2. Line cupcake pan with paper liners.
  3. In a large bowl, sift flour, baking powder and salt. Set aside. In a stand mixer, fitted with flat beater, beat the sugar and butter until well combined, about 2-3 minutes. Add egg and egg white, one at a time, beating on low.
  4. Then add vanilla. Gradually add flour mixture in 3 additions, alternating with milk in 2 additions, ending with the flour mixture. Fold in rainbow sprinkles.
  5. Fill cupcake liners about 1/2-2/3 full. Bake for about 17-20 minutes or until a toothpick inserted in the middle comes out clean. Remove from pan and cool completely on a wire cooling rack before frosting.

To make buttercream—
In a stand mixer, fitted with flat beater, beat butter until creamy, about 2-3 minutes. Add 5 cups of sifted powdered sugar, milk, and vanilla, beat until combined. Add more powdered sugar until you get to the consistency you want.

[NOTES: I think I added about 6-1/2 cups, give or take a few tbsp, to get the consistency I wanted. If its too stiff, you can add a little more milk.]

Frost with vanilla buttercream and garnish with more rainbow sprinkles.

ENJOY!


Keep up with CB at iheartcuppycakes.com or via her twitter feed!

Thursday
Aug132009

Guest Blog Post: Lemon Berry Cupcakes by Pâtisserie Natalie

Lemon Berry Cupcakes by Pâtisserie Natalie
When you visit Pâtisserie Natalie, you'll undoubtedly be impressed. The pictures are simply gorgeous; the recipes are creative and sophisticated, yet unfussy.

But you'll be even more impressed knowing that the baker/writer/photographer behind it all is still in high school. No, really.

With a professional-looking portfolio of photographs and recipes already under her belt, Natalie's future sure does look sweet; happily, she has prepared a guest post exclusively for CakeSpy.com! Here goes:


Hi, my name is Natalie, from Pâtisserie Natalie. I'm so excited to get to do a guest post for CakeSpy; I've been a fan for a long time. I'm a high school student from Seattle who loves photography, food styling, and baking. I've been interested in the arts since I was really little, and found my real calling through blogging. I didn't discover the food blogging world until recently. I also didn't realize how much I would love it. My blog gives me a way to share my design and creative flow with other people, as well as see other artist's work.

Lemon Berry Cupcakes by Pâtisserie Natalie
I started baking more seriously about 2 years ago, but it is now an addiction. Ask anyone who knows me and they will tell you I am more frequently in the kitchen then not. I absolutely cannot stay away from my kitchen aid mixer and my camera. I am self-taught in html/css coding, and do all my own graphics and layout work for my blog (CS Note: she's interested in pursuing a career in web/graphic design and photography).


I decided to make these Lemon Berry Cupcakes because as many people know, Seattle doesn't have that many sunny days during the year. Summer flavors for me are lemon and berries. Seeing as the sunny days are limited, I felt that I needed to make something that used those flavors. While I don't mind the rain at all (I love it, actually), many people are a little bummed that our summer days here are ending. With that in mind, I made these cupcakes as a sort of "summer revival." I've been working on the recipe for this lemon pound cake for a while, but I think I've finally got it. I'm often disappointed by lemon cake, as it doesn't actually taste lemony. That is not a problem for this cake at all. It's very moist and soft, which is not usually the case with pound cake. The frostings are made from raspberries and blackberries, which is why those frostings are so pink.

Lemon Pound Cake
  • 3 cups all purpose flour
  • 1 teaspoon salt
  • 1/2 teaspoon baking powder
  • 1/2 teaspoon baking soda
  • 2 sticks unsalted butter; softened
  • 2 cups sugar
  • 3/4 cup plain yogurt
  • 3 tablespoons lemon zest
  • 2/3 cup lemon juice
  • 5 eggs
  1. Preheat oven to 350 degrees F.
  2. Sift together the flour, salt, baking powder, and baking soda. Whisk together in a large bowl thoroughly, and set aside.
  3. In a stand mixer, beat butter and sugar until smooth.
  4. In a medium bowl, stir together yogurt, lemon zest, and lemon juice.
  5. Add the eggs to the butter and sugar one at a time, beating in between each addition.
  6. With the mixer on a low speed, add the flour mixture in 3 parts, alternating with the yogurt mixture in 2 parts. Start and end with the flour mixture.
  7. Line a muffin pan with paper liners and scoop even amounts of the batter into the cups, filling almost to the top.
  8. Bake for 16 minutes, rotating the pan after 8 minutes. Once golden brown around the edges, remove from oven and place on a cooling rack for at least 2 hours before icing.


Lemon Berry Cupcakes by Pâtisserie Natalie
Blackberry & Raspberry Buttercreams
  • 2-1/2 sticks unsalted butter; softened
  • 1 teaspoon salt
  • 2-1/2 cups powdered sugar; sifted
  • 1/4 cup blackberry sauce
  • 1/4 cup raspberry sauce
  1. Beat butter and 1 cup of powdered sugar until smooth. Divide into two parts, removing half from the mixer bowl. Add the blackberry sauce to the mixer bowl, along with 3/4 cup of powdered sugar. Place buttercream in a piping bag and pipe a circle around the outer edge of the cupcake top, spiraling in towards the center.
  2. In the same mixer bowl, add the remaining half of the butter and powdered sugar that was set aside. Add the raspberry sauce and 3/4 cup powdered sugar and beat until smooth. Place in a piping bag and pipe an extra dollop on top of the blackberry buttercream.

Blackberry Sauce
  • 1 cup blackberries
  • 2 teaspoons sugar
  • 1 teaspoon lemon or lime juice
Combine ingredients in a sauce pan and place over medium heat. Stir frequently until juices from berries boil. Using a wooden spoon, crush the berries in the pan. Let boil for 2 minutes to make sauce more dense. Strain the mixture if you prefer to have smoother frostings. Cool in refrigerator.

Raspberry Sauce
  • 1/2 cup raspberries
  • 2 teaspoons sugar
  • 1 teaspoon lemon or lime juice
Combine ingredients in a sauce pan and place over medium heat. Stir frequently until juices from berries boil. Let boil for 2 minutes to make sauce more dense. Cool in refrigerator.
Thursday
Aug132009

Love and Crumbs: A Peach Crisp Recipe from Moonrat

Happy Birthday to Moonrat
August is totally the sweetest month: it's the month during which CakeSpy was created, and it's also the month of your humble Head Spy's birthday! And so, in celebration of all of this sweetness, there's going to be a month-long celebration of birthday treats, featuring memories (and recipes) from a collection of CakeSpy pals. It kicks off with the lovely and amazing Moonrat, writer of the Editorial Ass blog, which gives a behind-the-scenes look at the publishing industry (and plenty of other fun social commentary). And--bonus--it happens to be her *actual* birthday! As for her laissez-faire birthday treat? Here goes:

Dadrat's Birthday Peach Crisp

When you're a kid, having a summer birthday seems like the short end of the stick. Not only are all your friends away on vacation when you want to have a party, but you can't even bring cupcakes into school for your class!

But I got over my righteous anger pretty quick, because I was a really, really lucky kid whose dad had a penchant for fruit trees. The white peach tree in our back yard would drop peaches at the exact right time each year for Dad to make me some of his peach crisp. Here's his recipe, Dadrat-approved.


Here's how Dadrat did it:

First, he'd make me collect all the peaches and check them for worms (pesky buggers; the antithesis of delicious!). But in case you don't have a white peach tree in your yard, or live in a cement box in the city (like yours truly), you can also buy peaches at the store. If you can find white peaches, they're really, really nice--softer, fibrous, tangy. You'll need about 4 cups. Unless you're doubling or tripling the recipe, which we usually do.

Then he'd preheat the oven to 425. Or around there; Dad dislikes numbers and favors cooking impressionistically. But let 425 be a guidepost for normal people.

Now while the oven is preheating, prep your peaches. You don't want any fuzzy skin in the crisp, so you're going to have to peel them. Luckily, there's a trick. If the peaches are fresh, put them in boiling water for about 30 seconds. Apparently this is called "blanching"--which is particularly humorous if you're using white peaches already. But anyway. Take them out and let them cool, and the skins will come right off. Definitely wait until they cool, though, so you don't burn your mitts. Peel, and slice.

Now stick your peach slices in a large bowl. Mix with:
  • 3/4 cup brown sugar
  • 1 tablespoon vanilla
  • 1 teaspoon of flour
  • 1 teaspoon cinnamon
  • 1/2 teaspoon nutmeg (if you like nutmeg, which I really really do)

Butter the bottom of a casserole and pour the peaches in. Squeeze some lemon (or lemon juice) over the peaches if you feel like it.

In a separate bowl, combine
  • 1/2 cup flour
  • 3/4 cup uncooked rolled oats
  • 1/4 cup brown sugar
  • 1/2 stick of cold butter, chopped up into little squares
If you want, you can throw in walnuts, too, which we never did when I was a kid, but which suddenly strikes me as an awesome idea, unless you are allergic to nuts, in whcih case I don't recommend it. But for everyone else, walnuts are both delicious and an excellent source of iron.

Sprinkle this dry mixture over the top of the peach mixture in the casserole. If you like--and I do--sprinkle an additional teaspoon of brown sugar over the top. It gets sweet and crusty.

Bake for about a half an hour. If you do it right, it doesn't turn to mush. My dad quothe, "The only reason to cook it is to heat it up."

Now you can eat it.

Keep up with Moonrat's rad adventures (and the occasional fuzzy animal picture) at editorialass.blogspot.com.
Monday
Aug102009

Sweet Surrender: A Little Debbie Death Match

Little Debbie Death Match
Oh, Little Debbie. You loyal lunchtime companion, you siren of saccharine sweetness. With you, we've unwrapped so many smiles--and you've never asked for anything in return.

Which is all to say, Little Debbie, that you never did anything to deserve what follows...but in the dark reality of the real world, sometimes bad things happen to good people. Yup--it's time for a...

Little Debbie Death Match

But first, to get some important information out of the way:

What have you done? A side by side comparison of several Little Debbie treats to see which one will rise victorious through various challenges. Winners were determined simply: at the end of each challenge, which seemed the most edible? (Though, as a disclaimer, we did not eat them afterward)
Little Debbie Display
Which Treats Were Used? Since the Little Debbie line boasts over 50 varieties of snack cakes, it was elected (for the sake of brevity, and to conserve cash) to choose just four treats that would be representative of some of the major textures and flavors; ultimately, it was narrowed down to the following contenders from their list of bestselling treats: Cosmic Brownies, Oatmeal Creme Pies, Swiss Rolls, and Zebra Cakes.

Why Did You Do This? To see which snack cake is truly superior. And also, you know, for fun.

Let the games begin:

Challenge One: Death by Boiling
Objective: To see which treat would last the longest when dropped into a pot of boiling water.
See you in hell, cosmic brownie!Still alive!
Brownie: Dude. This brownie was a survivor--while the icing melted fairly quickly, even after six minutes the cake part was holding strong and still retaining much of its original form. It wasn't until minute seven that it began to fall apart.
See you in Hell, Oatmeal Creme Pie!Oatmeal Creme Pie Boiling
Oatmeal Creme Pie: This little guy never stood a chance. Almost instantly the snack cake began to fall apart when it hit the boiling water; in under thirty seconds, it had completely liquefied, with not even crumbs remaining.
See you in Hell, Swiss Rolls!Swiss Rolls--After
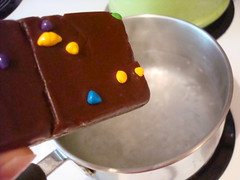
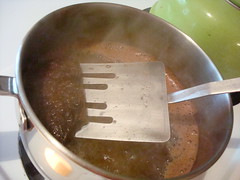
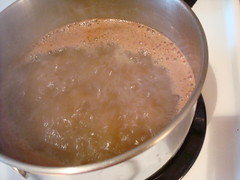
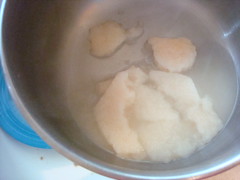
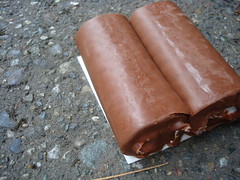
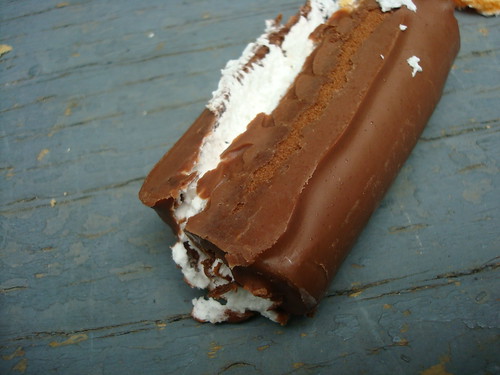
Swiss Roll: These dudes were probably the luckiest of the bunch: since they come in pairs, at least they didn't have to die alone. When the rolls hit the boiling water, the chocolate glaze melted almost immediately, with the cream filling following in short order--however, the cake held on for dear life, slowly unraveling and remaining solid (albeit bloated and soft) for a good four and a half minutes before the spongy pieces began to fall apart. 
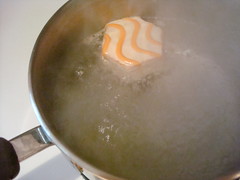
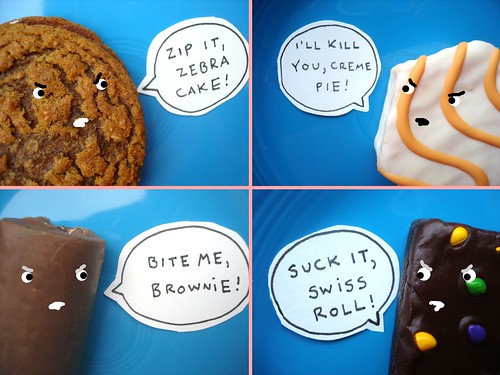
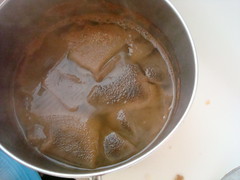
Boiling a Zebra cakeDeath to Zebra Cake!
Zebra Cake: 
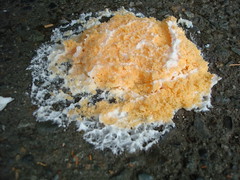
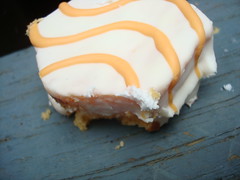
The first thing that happened was that this cake seemed to dissect itself: the top icing and middle creme layer began to melt, thus separating the cake layers, which then began to expand in the water. The pieces held steady for nearly five minutes until they began to disintegrate.
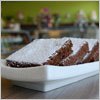
Winner: Cosmic Brownie, which not only lasted longest but also retained the best form.

Challenge Two: Death by Car
Objective: To see which treat would fare best when run over by a car.
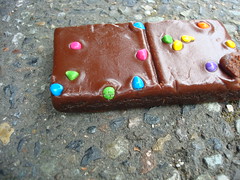
Cosmic brownie about to be run overSweet Roadkill
Brownie: 
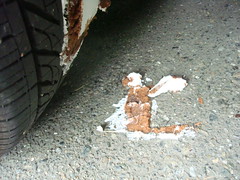
Held its form surprisingly well, considering that it was a frosted brownie--no frosting stuck to the car wheel. Perhaps because it was so oily? This one was definitely the most interesting to look at, too.
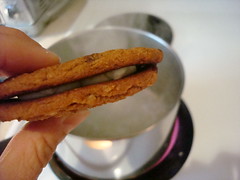
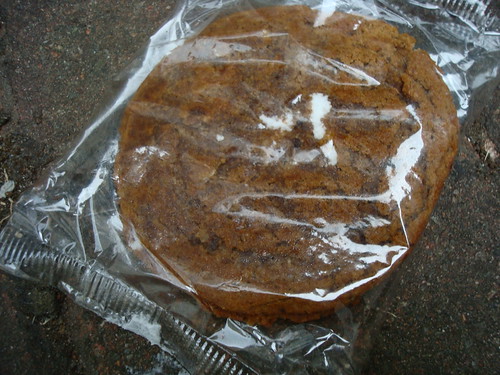
Oatmeal Creme Pie about to be run overRoadkill
Oatmeal Creme Pie: 
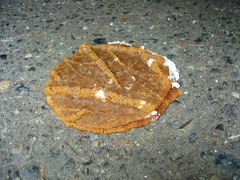
Like the brownie, this little sandwich cookie fared pretty well, retaining its general makeup and not even losing much filling. 
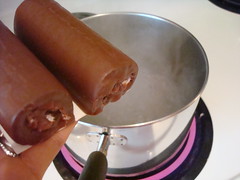
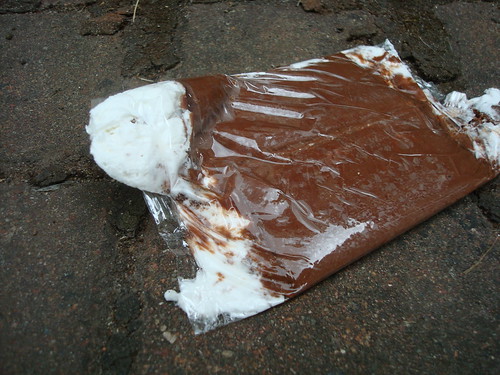
Swiss Roll about to be run overSweet Roadkill
Swiss Roll: Total Goners. They stuck everywhere: the tire, between the treads, the ground. It was grisly.
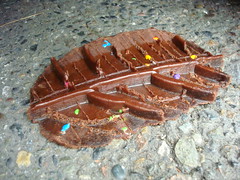
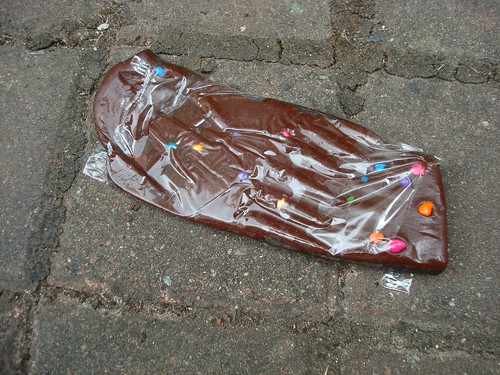
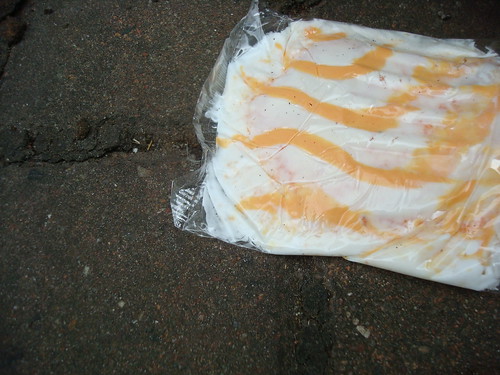
Zebra cake about to be run overSweet Roadkill
Zebra Cake: Not much better than the Swiss Rolls--it seemed as if this snack cake exploded under the weight of the car. 
Winner: Oatmeal Creme Pie. While it was a hard decision between this and the brownie, ultimately the fact that the filling was intact made it slightly more appetizing.


Challenge Three: Death by Flight
Objective: To see which snack cake would fare best after being dropped from a second-story window.
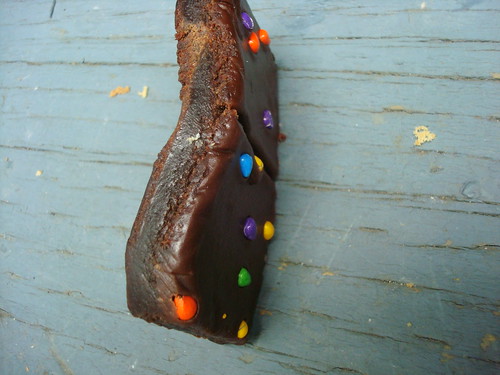
Fallen brownie
Brownie: After landing on its side, Brownie almost looked normal...but upon closer inspection, had a strange and unnatural twist in its side. Sure, it survived...but it would never be the same.
Oatmeal Creme Pie after falling
Oatmeal Creme Pie: The cookies acted as a protective buffer, and quite honestly, this one probably just could have been dusted off and given to a friend, and nobody would have been the wiser.
Fallen Swiss Cake Roll
Swiss Roll: The roll cracked open at the seam, allowing the sweet cream to ooze out--the equivalent of a confectionery head wound?
Massacre! Creme FillingFallen Zebra Cake
Zebra Cake: Poor, poor Zebra Cake. This one fared the worst, hitting a step on the way down and leaving a sad trail of creme filling as it went. Zebra Cake was so not okay.
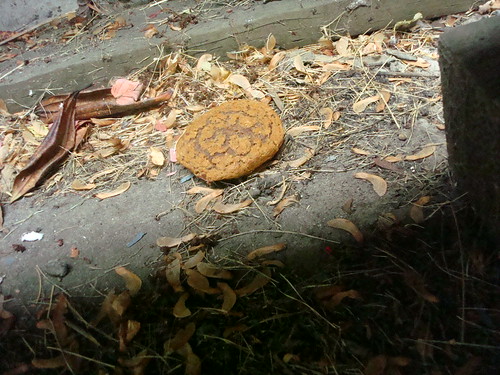
Winner: Oatmeal Creme Pie. It didn't seem to have suffered very much at all, other than collecting some dead leaves and dust.

Challenge Four: Death by Human
Objective: To see which treat will fare best when jumped on by a mature adult.
JumperDanny jumps on it
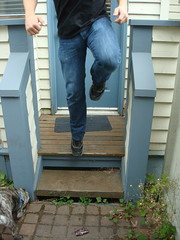
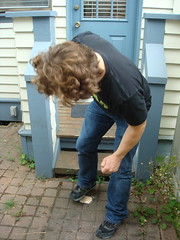
See? He meant business. 
Brownie after being jumped-on
Brownie: Not so bad at all. It definitely suffered, but didn't lose its form under the weight of the mighty jump.
Oatmeal Creme Pie, Smashed
Oatmeal Creme Pie: Sure, it's only a small bit of creme filling poking out of the top cookie...but who's to say it's not a cookie concussion, bound to claim the cookie's life at any moment?
Smashed Swiss Cake Roll
Swiss Roll: Oh, poor swirly treats: the creme that makes them so delicious was also their downfall, popping out at the ends and rendering them limp and a shadow of their former selves.
Ouch!
Zebra Cake: Though the form was somewhat intact, the moment the cellophane was lifted, half of the frosting and cake came with it. Another one bites the dust.
Winner: Brownie. It was close, but ultimately the Oatmeal Creme Pie looked like it might not survive.
Which Snack Takes the Cake? Looks like it's a tie between the Oatmeal Creme Pie and the Brownie--but if you want a sweet survivor, stay away from the the iced snack cakes--they're total softies.

Conclusion: Overall, these Little Debbie treats are hardier than you might think: they're willing and able to withstand all sorts of hardship and will generally remain surprisingly edible. Of course, whether this information is comforting or horrifying is up to you. Naysayers may express horror at the health implications of ingesting foods that won't die. But isn't it much nicer to think that if you grew up eating them, you might have absorbed some of these sweet super powers?
Little Debbie Death Match
© Cakespy, all rights reserved. Powered by Squarespace.