Home Home Home Home Home Home Home
CakeSpy

Featured: 

My adventure at Ben & Jerry's in Vermont!


Unicorn Love: the Eating Disorder Recovery Blog


 Buy my brilliant books!

Buy my new book!

Buy my first book, too! 

CakeSpy Online Retail!


Archives
Gallery

Fantastic appliance for cake making on DHgate.com

everyrecipe.co.nz

Craftsy Writer
Wednesday
Sep162009

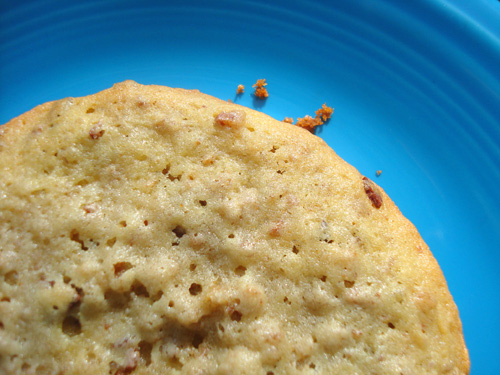
Getting Baked: Delicious Chocolate Chip Cookies from the Baked Cookbook

Chocolate Chip walnut cookies
How many times have I said that you simply must buy Baked: New Frontiers in Baking?

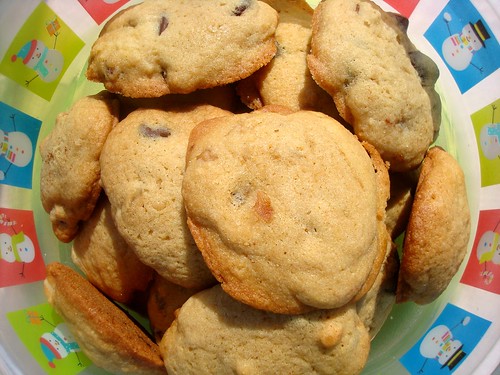
Well, if you don't own it, clearly I haven't said it enough. Here's how the book has renewed its place in my heart yet again this week: the absolutely perfect Baked chocolate chip cookie.

Now, I have made a fair share of chocolate chip cookies in my life, and am more than willing to admit that while they've been good, they've never been perfect. And while I don't want to go all dramatic on you and say these are the best chocolate chip cookies ever, I can say with absolutely no hesitation that these are the best cookies that have ever come out of my kitchen: chewy in the middle, ever-so-slightly crispy on the outside, slightly puffy and not too flat.

The secret? Well, at their retail location I suspect that they probably put crack in the cookies, but the recipe owes its awesomeness to stressing the importance of fresh ingredients: I promise, if you use fancy butter, fresh eggs, and real vanilla, it really makes all the difference.

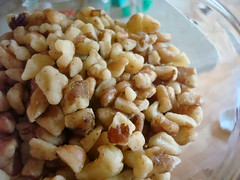
I only messed with their recipe slightly, omitting 2/3 cup of the chocolate chips and substituting walnuts. If you like your chocolate chip cookies a little fancy, it's a delicious variation.

Chocolate Chip Cookies, Ever so slightly adapted from the recipe in Baked: New Frontiers in Baking

Ingredients:
  • 2 cups flour
  • 1 teaspoon salt
  • 1 teaspoon baking soda
  • 1 cup (2 sticks) unsalted butter, softened
  • 1 cup packed dark brown sugar
  • 1/2 cup granulated sugar
  • 2 large eggs
  • 2 teaspoons pure vanilla extract
  • 2 cups semisweet chocolate chips
  • 2/3 cup walnuts

Directions:
  1. In a large bowl, whisk the flour, salt, and baking soda together; set aside.
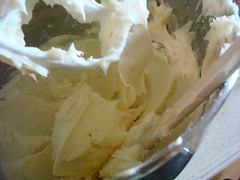
  2. In the bowl of an electric mixer fitted with the paddle attachment, beat the butter and sugars together until smooth and creamy. Scrape down bowl and add eggs, one at a time, beating until incorporated. Mixture will look light and fluffy. Add vanilla and beat for 5 seconds.
  3. Add the flour mixture, bit by bit, mixing after each addition.
  4. Using a spatula or wooden spoon, fold in the chocolate chips.
  5. Cover the bowl tightly and put in the fridge for several hours (Baked suggests 6; I did 2 and they were still delicious).
  6. Preheat the oven to 375 F degrees.
  7. If you want big cookies, use an ice cream scoop to scoop out 2-tablespoon sized balls. If you want smaller ones, use two teaspoons (one to scoop the dough and one to release it). Use your hands to shape into perfect balls and erase any imperfections. Place on prepared baking sheets, leaving at least 1 inch between cookies. Bake for 10-12 minutes for smaller cookies, 12-14 minutes for larger cookies. Make sure to rotate pans at the halfway mark to ensure even baking. They're done when the edges are golden and the tops are just starting to lose their shine.
  8. Remove pan from oven and cool on wire rack. They are great warm, but you could also let them cool, if you're so inclined.
  9. These babies can be stored in an airtight container for up to 3 days. Doubt they'll last that long though.
Wednesday
Sep162009

Royal Sweet: Princess Cake from Svedala Bakery, Seattle

Princess Cake from Svedala Bakery, Seattle
When Kristina of Svedala Bakery sent a message saying she'd recently made a batch of Princess cake and invited me to try some, the response was swift and without hesitation: Y.E.S.

And so a sojourn was made to Svedala's small location in the Pike Place Market (in the same corridor as Daily Dozen Donut Co.) and she gave us two pieces to-go.

The first thing you'll notice about Svedala's Princess Cake is that it's pink, as opposed to the more frequently seen green (remember how it became a CakeSpy obsession a while back?). Why so? Well, it's actually a green reason: since they color and flavor all of their baked goods naturally, they've found that the color they can get from beet juice is much more appetizing than natural green dyes, which tend more toward a drab green.

But you're not going to want to linger on the color for long. At this point, you're going to want to get this cake in your mouth.
Princess Cake from Svedala Bakery, Seattle
Svedala's princess cake is--how else to put it--transcendent. It's a beautiful balance, with lighter layers of sponge cake and a rich whipped cream which is somehow light at the same time that it coats your mouth with a creamy flavor, anchored by more substantial vanilla bean pastry cream and fresh jam layers, and it's all held together by a rich, almondy marzipan. Once slices are cut, the marzipan layer all but melts into the cake, which makes for a perfect marriage of flavors, especially along the edge of the cake. While I had initially expressed a concern that the marzipan layer might be too thin for safe transport, I have been assured that the cake does transport better as a whole cake, and that the baker has been considering some different options to help the cake maintain form better.

If you are in Seattle, this one is a must-try. Since the Princess Cake is not available every day, please do call ahead for availability.

Svedala Bakery, 93 Pike Street #3, (just around the corner from “Rachel” the pig); 206.890.9774 or online at svedalabakery.com.

If you are not in Seattle, don't despair: you can find more Princess cake lore here, and a recipe for an American variation on the Princess cake here.
Monday
Sep142009

Cookie Monster: The Bacon, Cereal and Orange Juice Breakfast Cookie for Serious Eats

Bacon, cereal and orange juice Breakfast Cookies
You love breakfast. You love cookies. So why have they been kept separate for so long?

They join forces in one whopper of a cookie for my latest feature on Serious Eats: the Bacon, Cereal, and Orange Juice Breakfast Cookie! Each of these monster cookies contains an AM trifecta of deliciousness, balancing sweet and savory with plenty of butter on top.

Worth waking up for in the morning, or have I made you want to vomit into your coffee? Either way, it's an interesting recipe, based on one that I found in a 1980s cookie cookbook!

Check out the full entry here.
Friday
Sep112009

Baker's Dozen: A Batch of Sweet Nanaimo Bar Links

Blonde Nanaimo bar from Happy Donuts, Anacortes
Nanaimo bars are, simply put, heaven on a plate: rich little nuggets consisting of three layers of awesomeness: a thick, cocoa and coconut crust anchors a dense slab of custardy buttercream, all topped off with a substantial shellac of soft but firm chocolate. They're a specialty from the city of Nanaimo, but can be found in bakeries in the BC environs as well.

But did you know that there are some very delicious variations on the classic? Here is an assemblage of sweet variations of (and in some cases, embellishments upon) the delicious Nanaimo Bar:

Nanaimo Bar Cheesecake: so rich you will probably die, but at least you will die happy.

Raw Nanaimo Bars: you won't burn down the house for these babies.

Peanut Butter Nanaimo Bars: the creamy, rich peanut butter adds a subtle savoriness to the bars.

Nanaimo Bar Ice Cream Cake: two beautiful things just got more beautiful.

Cappuccino Nanaimo Bars: Coffee adds a nice flavor dimension to this sweet variation.

Cherry Nanaimo Bars: Rich, but with some natural sweetness too.

Peppermint nanaimo bars: this is what Thin Mints want to be when they grow up.

White chocolate and pecan Nanaimo Bars: White chocolate lovers can't miss this sweet variation.

Vegan Nanaimo bars: Because it's not always all about the dairy.

Nanaimo bar mix: If you don't want to make your own, I won't tell.

Chocolate nanaimo bar pie: Once again, two awesome things get awesomer.

Gluten free nanaimo bar: Free of gluten, but not free of delicious.

Bonus: If you're in NYC, Dirt Candy is serving up several variations on the Nanaimo bar!
Wednesday
Sep092009

Some Like it Hot: Hot Cocoa Cupcakes With Cream Cheese Frosting

Chocolate cupcakes with cream cheese frosting
Summer is totally awesome and all, but it seems to me as if there are way too many light, fruit-based and altogether too-virtuous desserts that prevail during those hot and sunny months. But as the days gradually start to get shorter and cooler, there's a sure-fire antidote, which can be summed up in three beautiful words: Hot Cocoa Cake. This is not a cake for wimps: it's unimaginably rich and decadent. Often, recipes for it call for a fudge-like frosting to be applied directly to the still-hot cake; however, as I've always preferred chocolate desserts that have a flavor contrast, I tried them with cream cheese frosting on a whim. The flavor combination works like a dream; when served at a party, they disappeared rather quickly.

Hot Cocoa Cupcakes With Cream Cheese Frosting

For the cakes (makes about 18; adapted from this recipe):

Ingredients
  • 2 cups flour
  • 2 cups sugar
  • 1 teaspoon salt
  • 4 tablespoons cocoa
  • 2 sticks (4 oz. ea) butter
  • 1/2 cup buttermilk
  • 1 cup water
  • 1 tsp cinnamon
  • 1 tsp vanilla
  • 1 tsp baking soda
  • 2 eggs, beaten

Directions:
  1. Preheat oven to 400 F.
  2. Mix together flour, sugar, and salt. 
  3. In a saucepan, bring the butter, cocoa, and water to boil and pour over flour mixture. 
  4. Add the rest of the ingredients to the mixture and stir well. 
  5. Fill cupcake cups 3/4 full.
  6. Bake for about 20 minutes. Because you won't see the cakes browning at the edges, use a toothpick inserted in the center of a cupcake to test doneness.
  7. Once cool, frost generously with cream cheese frosting; if desired, garnish with walnuts.
Cream Cheese FrostingWalnuts
For the frosting:

Ingredients
  • 1 (8)-ounce package of cream cheese, softened (do not substitute low-fat; it just doesn't work the same way)
  • 1/2 cup unsalted butter, softened
  • 2 teaspoons vanilla extract
  • 1/4 teaspoon salt
  • 4 to 6 cups confectioners' sugar (depending on your desired consistency)
Directions
In a large mixing bowl, beat the cream cheese, butter, vanilla and salt until the butter is completely incorporated into the cream cheese and it has a smooth consistency. Add the confectioners' sugar cup by cup, stirring after each addition, until it has reached the desired consistency.
© Cakespy, all rights reserved. Powered by Squarespace.